So today I was going through our mail/paperwork which is always a huge mess! My fiance and I need a way to keep our mail organized! I found a small shelf that I was going to turn into a cute mail holder for our kitchen... but I realized I had the wrong paint for the job =( I guess that will make for a future blog, haha. Since I was still in a crafty mood, I looked through my craft bins for the wedding and had a great idea! I got out my nail polish and some glitter I had found. Originally this glitter was going to be for wedding projects but who says you can't step outside of the box?? I'm always on the hunt for great glittery nail polish but I'm usually left disappointed. For one, they never seem to shine very well. For two, they seem to need a lot of layers to get that full coverage glittery effect. With that said, the thought crossed my mind... why don't I just paint my nails and add my own glitter?! I tried it out and it turned out amazing! I polished my nails off with Revlon's No Chip Top Coat to make sure the glitter stayed on.
Of course you can buy nail glitter and all kinds of other things to put on them. In fact, my next trip out will be to Sally's Beauty Supply to check out what they have. I for one am definitely going to stick with real glitter from here on out since I am trying to achieve that full glitter coverage look =) I'm always looking for ways to create nail art with things you might already have in your craft bins!
Check out this link to see what Sally's has to offer: http://www.sallybeauty.com/facial-glitter/SALGRL2,default,pd.html
Check out this link to see what Sally's has to offer: http://www.sallybeauty.com/facial-glitter/SALGRL2,default,pd.html

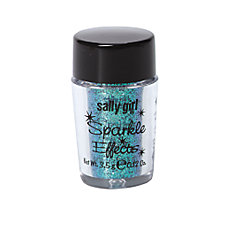
Just 99 cents for this jar of loose glitter =)


No comments:
Post a Comment