
I was originally going to blog about how red seems to be all the rage lately, not to mention purple! I took this to another level today though. While I was out running errands though, I realized I was near Sally Beauty and thought I'd stop in. You see, I have been coloring my hair black on and off for years but lately decided to stick with it! The only downfall to black is when you want to add color, its a pain in the rear to take the black out. With that said, I thought I would just try to add red colored hair extensions! This way I get the benefit of a little longer hair and a bright new color without the hassle of paying big bucks and a lot of time in the salon.
You can add hair extensions a number of different ways: fusion, weaving, bonding, clip-ins, the mini-link method and tape on. The first few methods can cause damage to your hair but last longer. The last few don't cause very much damage if any at all but don't last quite as long either. Its a personal preference and also depends on how much money you are willing to throw down. I create these blogs and try to aim for the everyday person who loves a little challenge, some DIY (do-it-yourself) and who wants to save a buck! With that said, here are the two ways I recommend you go about adding extensions: Clip-ins and the mini-link method!
Now, before I explain any further I just want everyone to know that I have actually been working with clip-ins for almost a year now. Here is what I purchased:
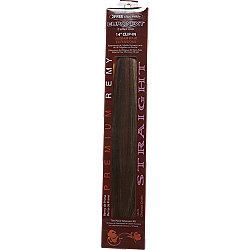
I bought brown and later ended up coloring them black. ALWAYS BUY REAL HUMAN HAIR! Synthetic hair extensions cannot be styled with heat! This particular brand has held out for almost a year now for me and they are still going strong! Just take extra care of them! All you have to do is find a good place to put them on your head and literally just clip them in! When you want to take them out, just unclasp them! Its THAT simple! I know someone who went into a salon and paid about $500 to get hair extensions bonded to her real hair and then she tried clip-ins at home as her next method... she said never again will she go back in to the salon. Clip-ins are where its at! I paid in the ballpark of about $150 back when I got mine. The funny thing is, I already have extremely long hair! I was one of those who just wanted to add extra body to my head of hair! For me its not adding length but just more hair, ha ha =)
This is my number one recommended method!
My number two is the mini-link method!
This one is appealing because its very affordable and it can spice up your look with little effort!
Here is what you will need:

The actual hair extensions were just a little over $20 and the links were under $20.

Be sure to have pliers!

I panicked for a moment because I couldn't find my crochet hook but then I remembered my fiance was going to attempt dread locks at one point. He purchased this packet of hooks so I got lucky there!

You simply put your hook through a bead...

Pull a very small bit of hair through the bead using the hook. This gets easier and faster once you know what you are doing. It might be a little frustrating at first, ha ha. Just hang in there! It gets much easier!

Using the pliers, clamp down on the bead as hard as you can so that it locks the top of the hair extension to your hair. Try to do this as close to your roots as possible.

Make sense? =) Pretty simple, huh?

The photo above is what it will start to look like! At this point I hadn't even used half of the extensions yet. The more you add, the more dramatic your look!

ROCK ON!!
So now you have an idea just how easy the clip-in and mini-link methods are!
The blog on hair extension is really very nice.Thanks for this valuable information on hair extension.
ReplyDeleteBlack hair extensions